Bed side table paint sketch
Process of a casual, watercolor and pen still-life
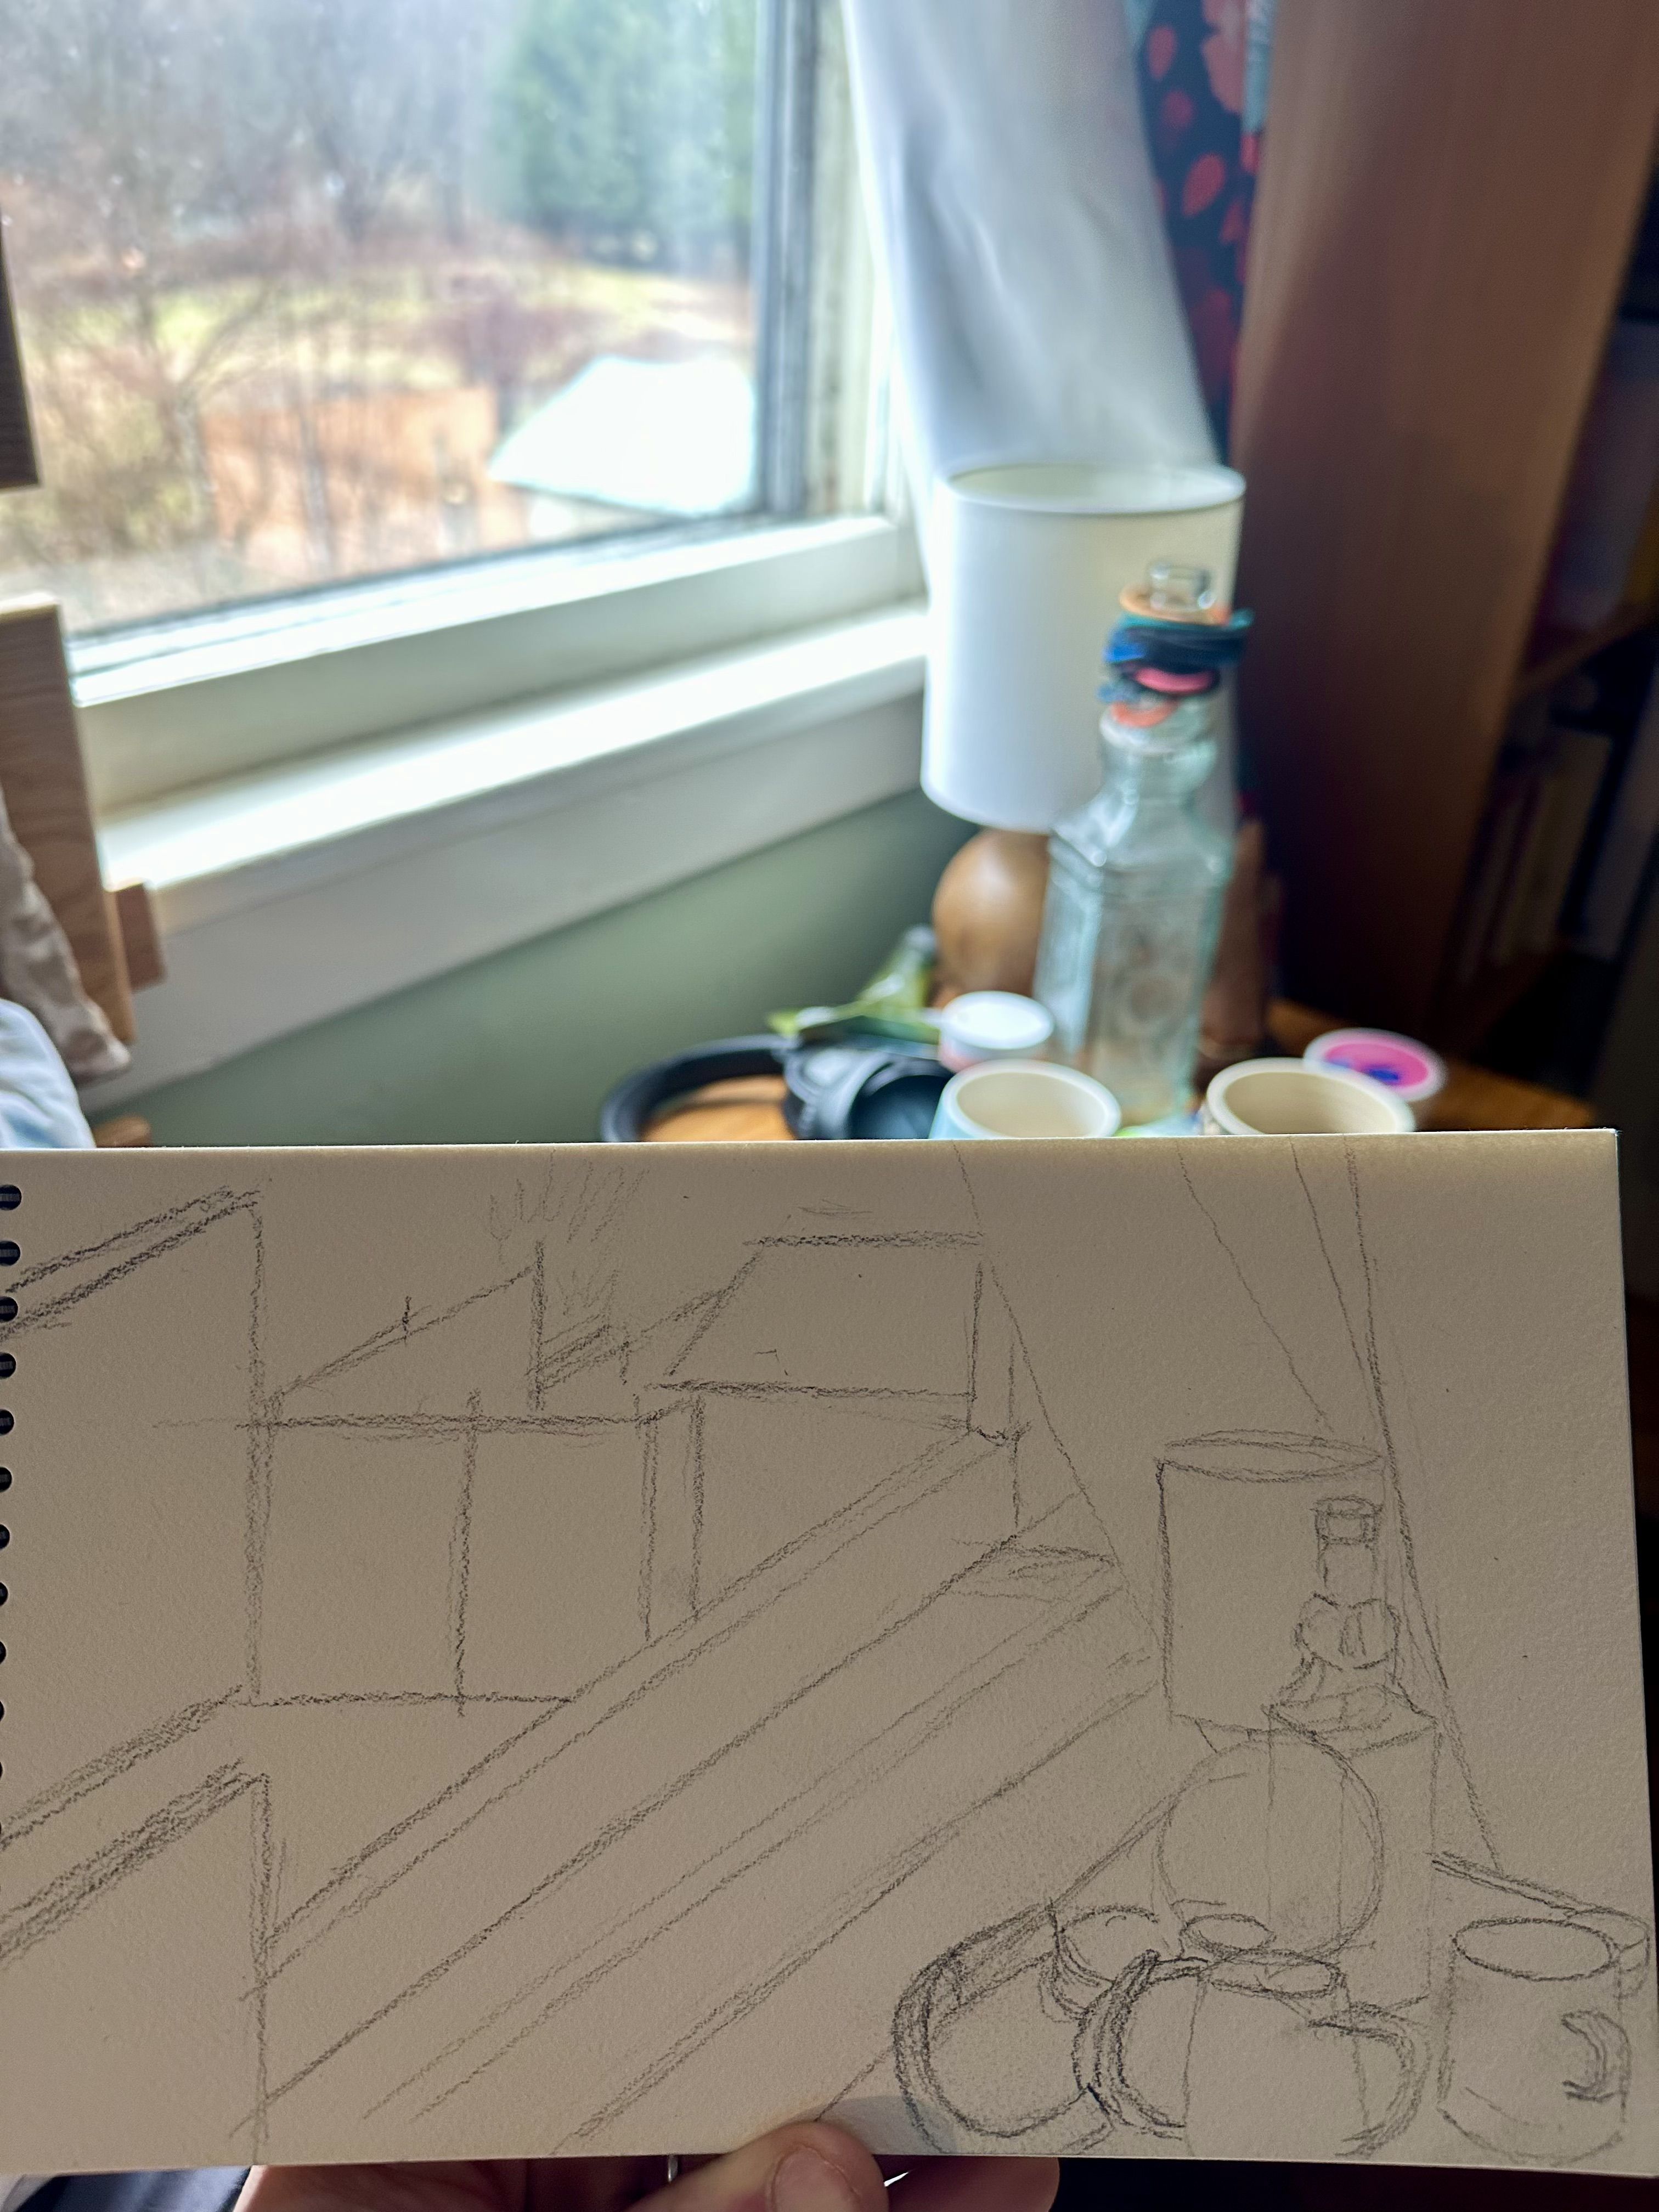
Step 1: choose the scene. This one was partially chosen because I had a comfortable seat :) It’s an honest still life. It also had nice, natural, cloudy light. I’m drawn to capture layers—foreground objects, a window frame, background layer, birds far away, etc.
Step 2: rough out the scene. Here I try not to get sucked into doing detail, which is VERY difficult, in order to move to pen work quickly. I try to get the angles correct, and any troublesome figures mapped out (like the hair tie holder and the headphones.)
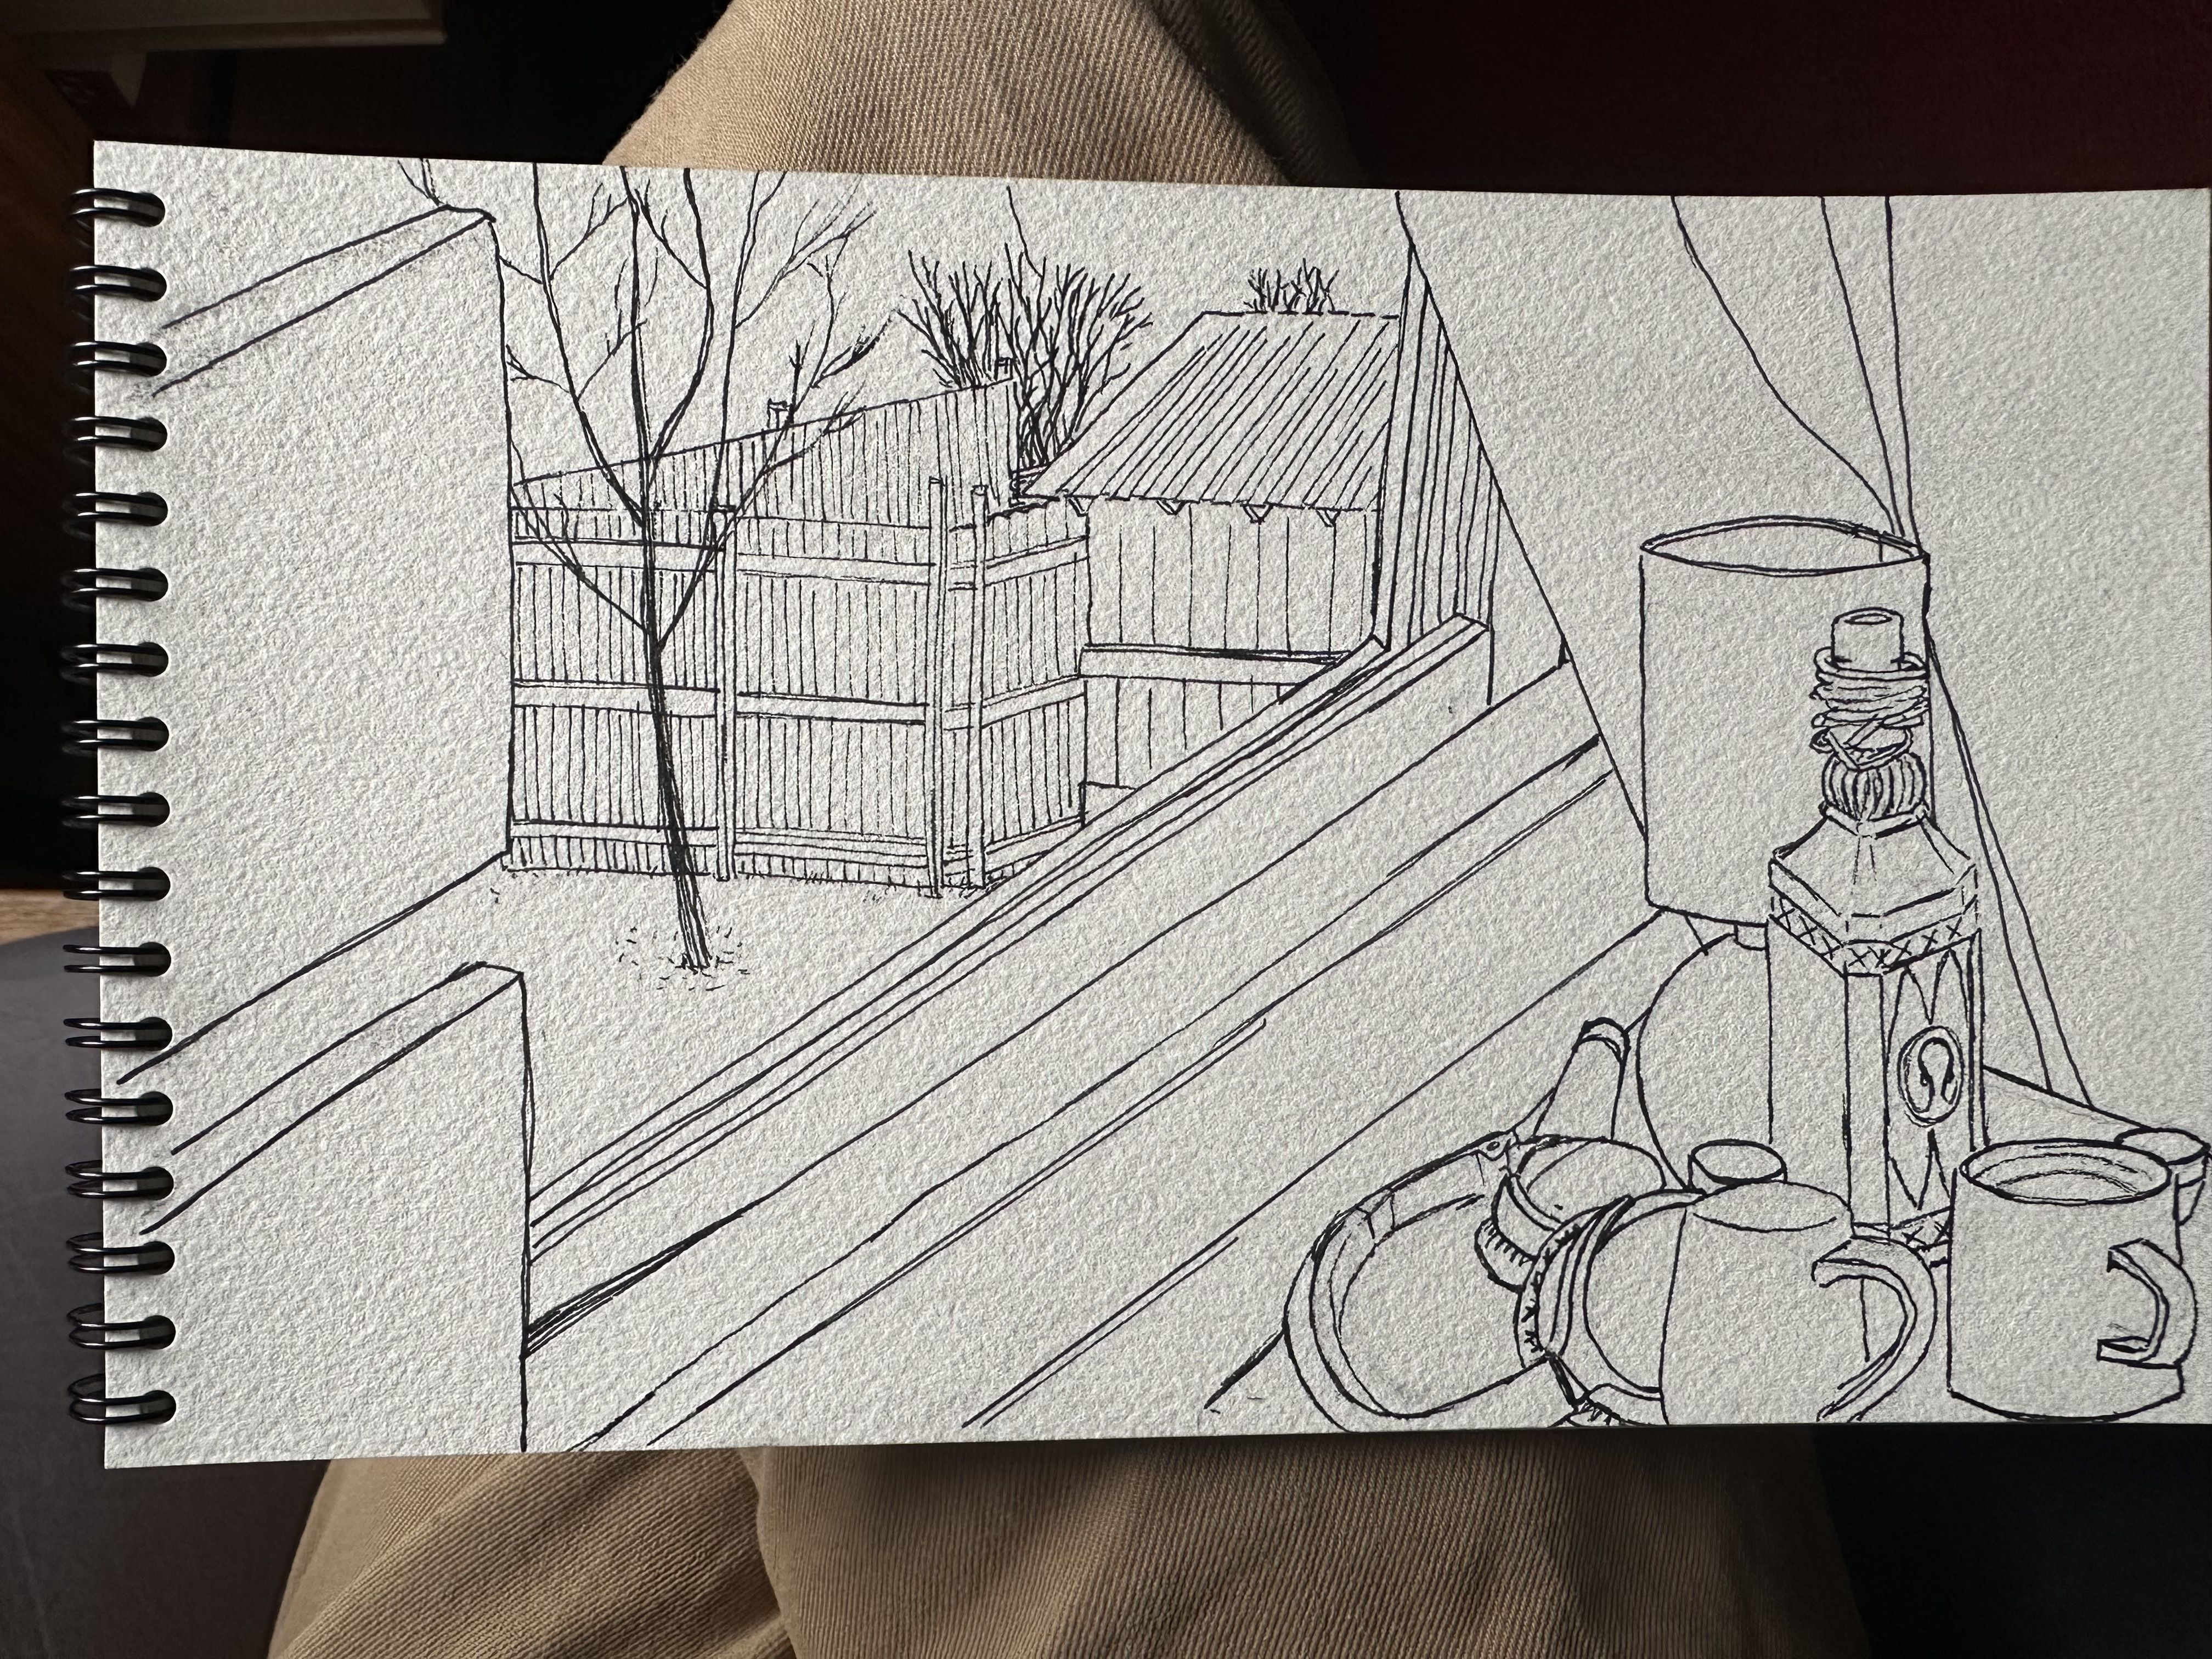
Step 3: pen in details that have edges. No shadows or patterns yet. I work from foreground backward to make sure any overlapping elements are done first. In this image, I’ve already erased the pencil. I like to use a waterproof, fast drying pen here to reduce smudging and handle water paints later. Traditionalists skip the pen and jump right to paint.
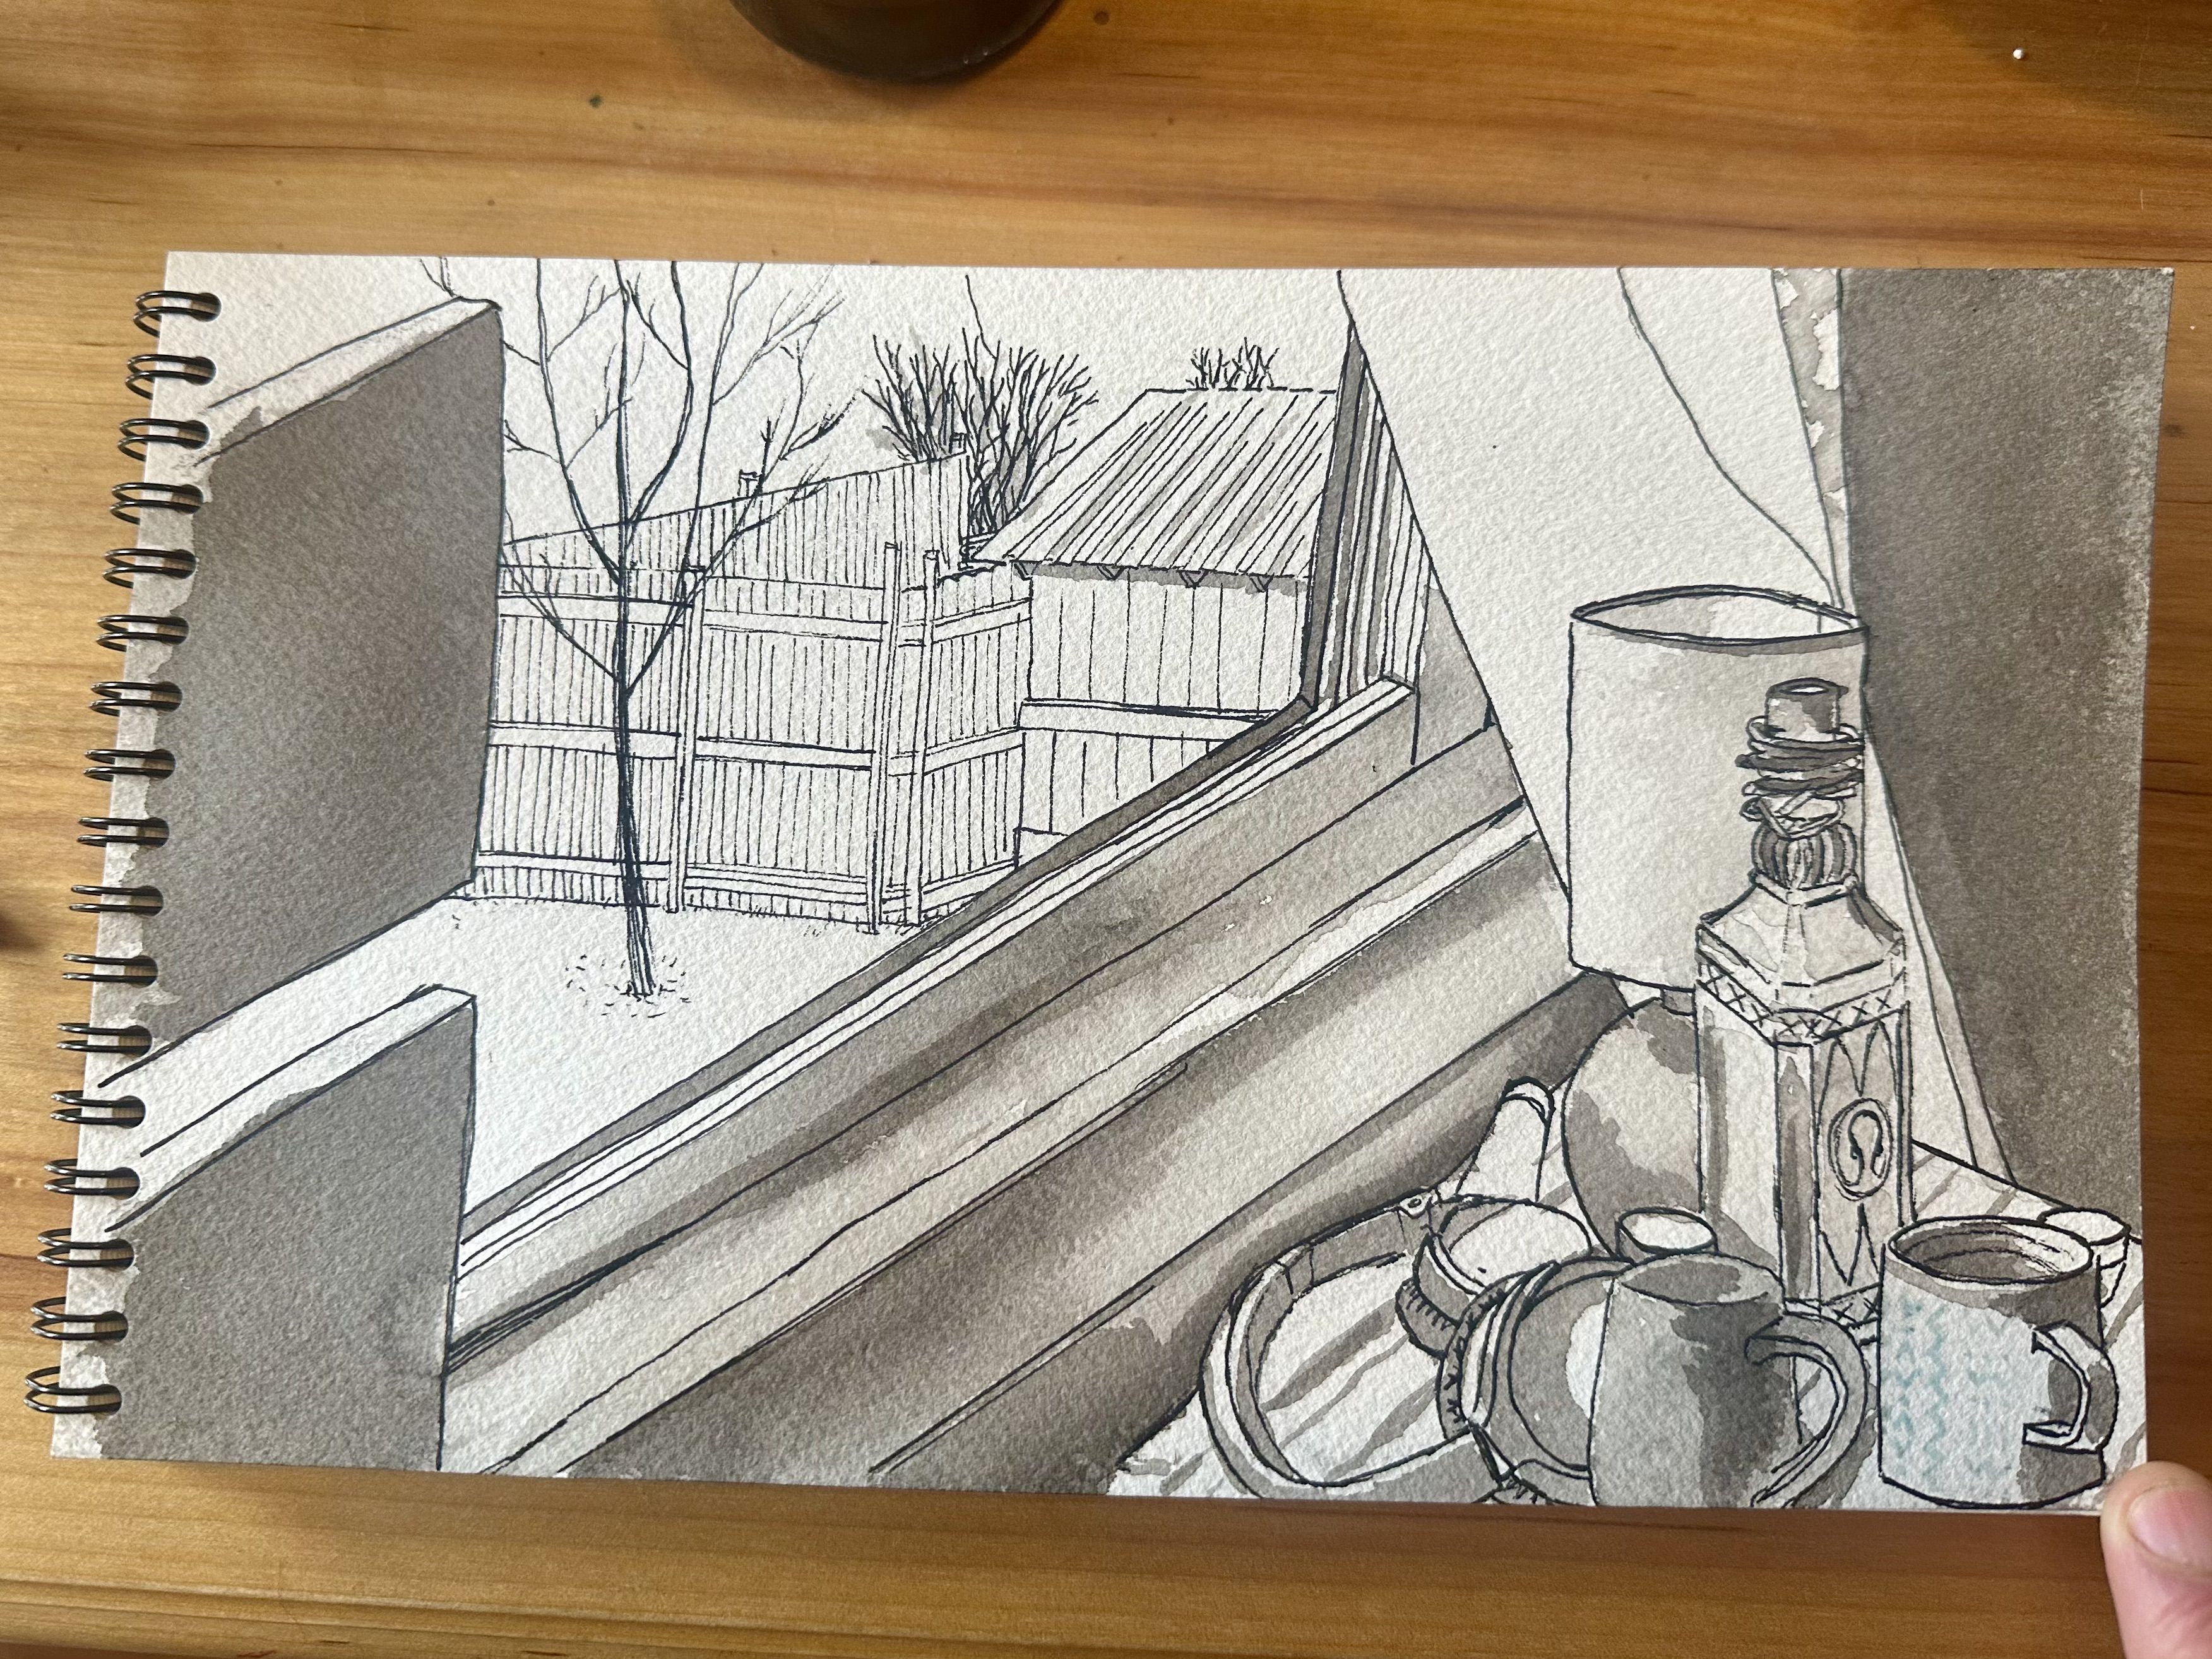
Step 4: tonal wash. I use an India ink wash to paint the darkest tones. I think I went a little too far with the wall and sill. I also tried some masking fluid on the mug, if you can notice the blue markings on it. That was SUPPOSED to rub off after it had a coat of color/ink on it, but it didn’t seem to work and started tearing away at the paper. Maybe this paper was too corse? Ink wash is where I do shadows and patterns, like wood grain.
Step 5: Sometimes I stop here. But because I overdid the wall with darkness, I moved on to color to help balance it out and bring interest to other areas.
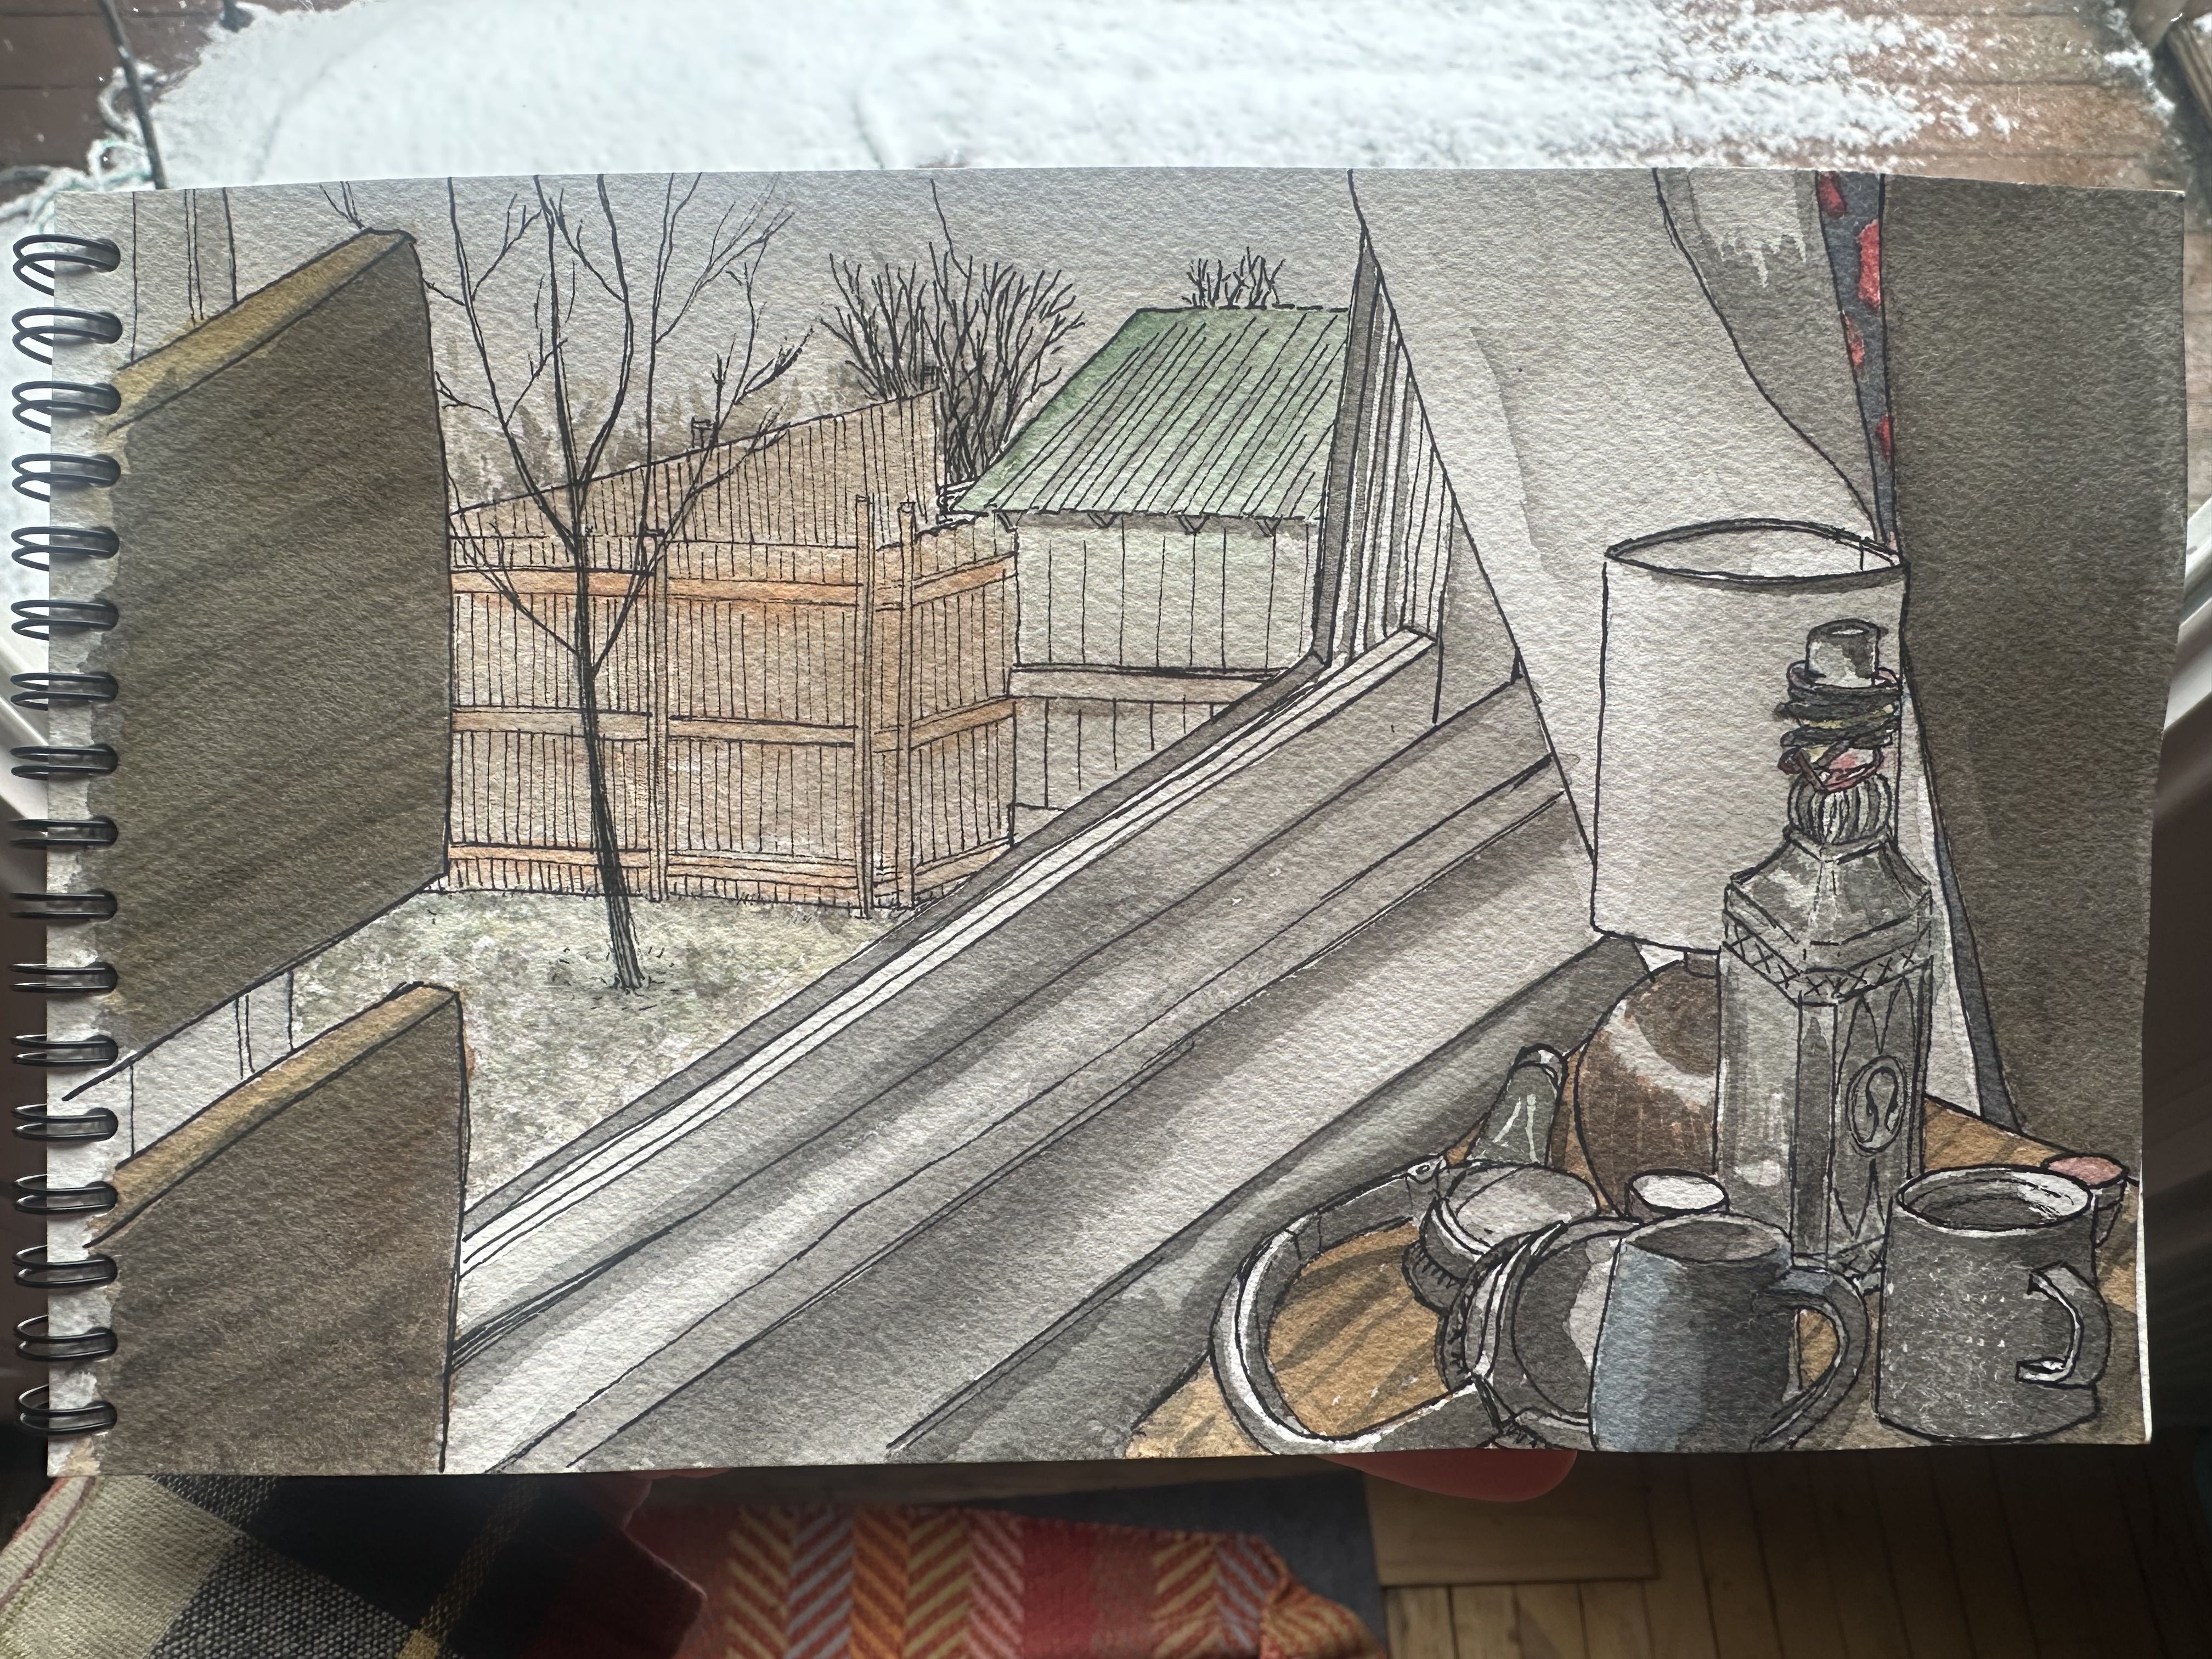
I’m pretty pleased with it.
These studies act like a journal. It’s nice to flip back to something like this years later, to remember what was going on at this time and place. Remember the cups that may now be broken, or tree that may have grown.
In community, In art,
Wes